I've blogged previously about Matariki.
- Matariki - an overview of a unit of work from 2012 when I had a Year 5-8 class.
- Matariki Art from 2016 when I was relieving in a couple of Year 5/6 classes.
- A touch of Matariki for 2017 when I relieved in a Y3/4 last year, which I recently published.
- te reo Maori
- making rakau
- learning rakau games and songs
- waiata
- making a decorative Matariki karearea kite
- weaving paper Matariki fish.
- those paper plates with wool stars
- a colaborative Matariki mural
My motivation was this photo:

And you can see another variation at this blog post: Matariki Whetu - Stars for Matariki on the blog Nat Gets Nifty.
I simply put some A3 cartridge in a small pile and cut long triangles. I then demonstrated how to use chalk to draw the initial design and how to use the pastels to get the students motivated. Then I let them loose.


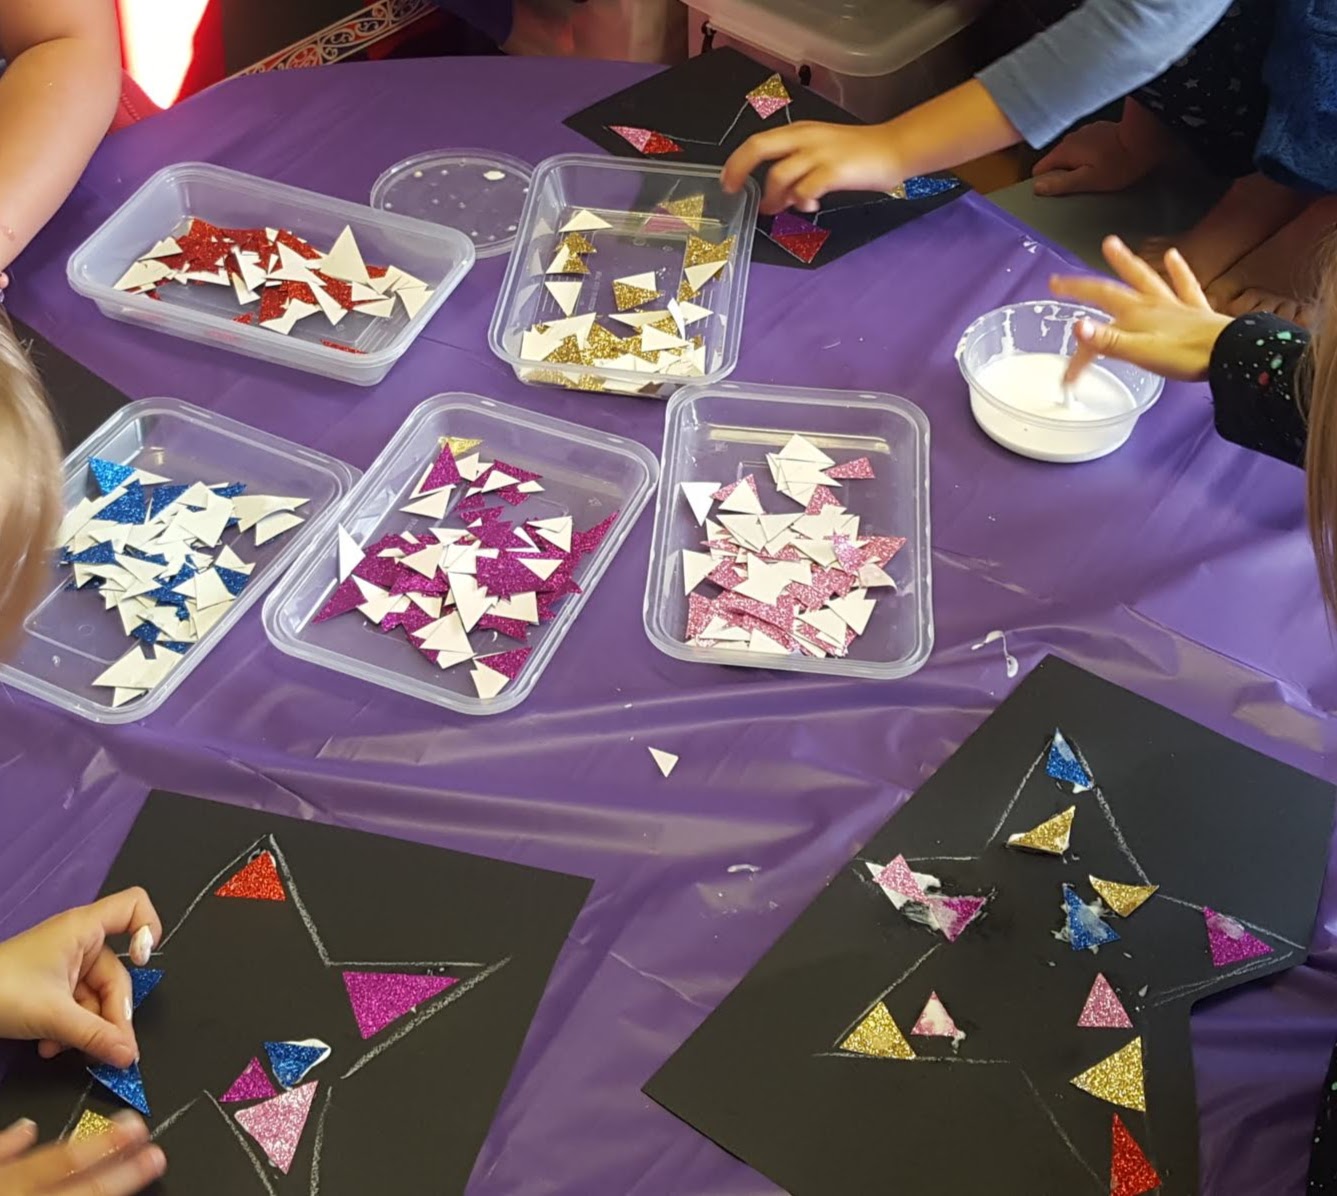
My next Matariki idea was a gluing activity. This activity from Room 8 Pinehill School's Matariki Art Work blog post was my inspiration.

So off to David's Emporium I went and I purchased five sheets of different coloured sparkling paper. I cut these into triangles of various size and put each colour in a different bag. On the Friday we did this activity, I drew enough stars on black paper with chalk and roughly cut them out. I emptied each bag into its own tray (thank you Chinese takeaways) and I have some PVA glue ready to go in the smallest deli containers from New World. I demonstrated how to do this, stipulating that they shouldn't touch the chalk with the sparkly triangles and the sparkly triangles shouldn't touch each other. My top tip was to start at each of the five tips of the stars before gluing back towards the middle.


Then came Matariki workshop day. My motivation was Matariki kites and the karearea (aka the New Zealand falcon as seen on the $20 note.


I then found two circular Maori themed mandala designs for my a couple of students in my class to colour in for the head. And then we added a coloured beak. Alas I forgot to take a photo of this completed in the end.
When my class came back to me after lunch, I got them to explain what they had done in the other classes. Inspired by what the other teachers had done, I decided I wanted to do some activities again with my own class for our display. I was sure I could figure out the paper plate activity, but the fish paper weaving required me to get a tutorial from one of my colleagues.
So our first step was to paint the paper for our paper weaving (a great way to use up the paint in my New World deli containers before the term break). I also gave them bits of sponge to splodge other colours on with and I sprinkled glitter over them. The idea is to cut them into strips. I've used the width of a medium width $2 Shop ruler to get a consistent size.


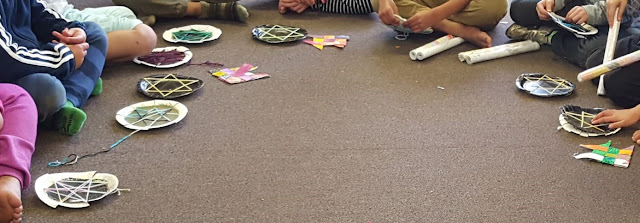
The paper plates are for the stars. The children coloured them in with crayons and then painted over them with black paint. Once they were very dry (several days later) we scratched pictures into the paint and I cut seven slits in around the edges of each plates.
I tied the wool on and the kids weave the wool through the slits to get the star shape. Obviously, they have to do a wee bit of problem solving. When the first colour ends I tie on another colour. Our stars are just that little bit different to what they did in the other classes on purpose.
All those painted A3s up above were destined to be our Matariki fish. I cut out each strip of paper after ruling them all up to the 2.5cm width of a ruler.


Each person needs six strips - three of one colour, three of another colour - as above. In the pictures below, you will see that we folded each strip in half.


Then the weaving begins.
When we got to this point, I staped the fish. The teacher I learned this from was using glue sticks, but I found it didn't work and went for the stapler for expediency.

Then I showed the children how to use draw fishy fin shapes on the flappy bits of the weaving and cut it out to get a fishier looking fish.
Eventually I got around to putting up the display....


I forgot to take a photo after I added the fish, But it looked absolutely awesome - I may be a bit biased though.


My next Matariki idea was a gluing activity. This activity from Room 8 Pinehill School's Matariki Art Work blog post was my inspiration.

So off to David's Emporium I went and I purchased five sheets of different coloured sparkling paper. I cut these into triangles of various size and put each colour in a different bag. On the Friday we did this activity, I drew enough stars on black paper with chalk and roughly cut them out. I emptied each bag into its own tray (thank you Chinese takeaways) and I have some PVA glue ready to go in the smallest deli containers from New World. I demonstrated how to do this, stipulating that they shouldn't touch the chalk with the sparkly triangles and the sparkly triangles shouldn't touch each other. My top tip was to start at each of the five tips of the stars before gluing back towards the middle.

Then came Matariki workshop day. My motivation was Matariki kites and the karearea (aka the New Zealand falcon as seen on the $20 note.


I needed to make the activity something that children from NE to Year 8 could do. Thank you Twinkl for having feather templates!!! I downloaded those and allowed the students to choose the feathers they wanted to colour in. I had a lot of colouring pencils which I put out on the trays from the Chinese takeaways and let the kids go for it. For good measure I put on Hirini Melbourne's classic album He Waiata ma te Katoa as a background.


I was privileged to have two parents come into help me. They had the job of cutting out the feathers. And I had the job of gluing the feathers onto the template, which was a very crude bird outline on black A2 paper. We ended up making two karearea.


I then found two circular Maori themed mandala designs for my a couple of students in my class to colour in for the head. And then we added a coloured beak. Alas I forgot to take a photo of this completed in the end.

When my class came back to me after lunch, I got them to explain what they had done in the other classes. Inspired by what the other teachers had done, I decided I wanted to do some activities again with my own class for our display. I was sure I could figure out the paper plate activity, but the fish paper weaving required me to get a tutorial from one of my colleagues.
So our first step was to paint the paper for our paper weaving (a great way to use up the paint in my New World deli containers before the term break). I also gave them bits of sponge to splodge other colours on with and I sprinkled glitter over them. The idea is to cut them into strips. I've used the width of a medium width $2 Shop ruler to get a consistent size.


The paper plates are for the stars. The children coloured them in with crayons and then painted over them with black paint. Once they were very dry (several days later) we scratched pictures into the paint and I cut seven slits in around the edges of each plates.
I tied the wool on and the kids weave the wool through the slits to get the star shape. Obviously, they have to do a wee bit of problem solving. When the first colour ends I tie on another colour. Our stars are just that little bit different to what they did in the other classes on purpose.
All those painted A3s up above were destined to be our Matariki fish. I cut out each strip of paper after ruling them all up to the 2.5cm width of a ruler.


Each person needs six strips - three of one colour, three of another colour - as above. In the pictures below, you will see that we folded each strip in half.


Then the weaving begins.
When we got to this point, I staped the fish. The teacher I learned this from was using glue sticks, but I found it didn't work and went for the stapler for expediency.

Then I showed the children how to use draw fishy fin shapes on the flappy bits of the weaving and cut it out to get a fishier looking fish.
Eventually I got around to putting up the display....


I forgot to take a photo after I added the fish, But it looked absolutely awesome - I may be a bit biased though.
Just looking for art ideas to work on next term with special ed, this page is fantastic, thank you for sharing!!!
ReplyDeletethis would work great for my seniors too! thanks!
ReplyDelete